Peperomia, with its stunning diversity and relatively easy care requirements, has become a favorite among indoor plant enthusiasts.
These charming plants are known for their succulent-like leaves and adaptability to various environmental conditions. One of the fundamental aspects of successful peperomia care is choosing the right soil.
In this comprehensive guide, we’ll delve deep into the world of peperomia soil, discussing its composition, characteristics, and the best practices to ensure the health and vibrancy of your precious peperomia plants.

Table of Contents
What are Peperomia Plants?
Before we jump into the specifics of peperomia soil, let’s take a moment to understand these wonderful plants.
Peperomias belong to the Piperaceae family and are native to tropical and subtropical regions of Central and South America.
With over 1,000 different species, peperomias come in a wide range of shapes, sizes, and colors, making them a versatile choice for indoor decoration.
One of the key features of peperomia plants is their succulent-like leaves. While they’re not true succulents, they do have fleshy leaves that store water, allowing them to withstand periods of drought.
This water-storing ability influences the kind of soil that is best suited for their growth.
Read: Peperomia Benefits for Home and Health.

The Role of Soil in Peperomia Care
When it comes to the care of your beloved peperomia plants, the role of soil cannot be underestimated.
Soil serves as the foundation upon which your plants thrive, providing them with essential nutrients, moisture, and a stable environment for root growth.
For peperomias, which exhibit characteristics similar to succulents, the choice of soil becomes even more critical due to their preference for well-draining conditions.
Peperomias have adapted to store water in their leaves, allowing them to withstand periods of drought.
This unique characteristic impacts their soil requirements, making a well-draining and moisture-balanced mix crucial for their overall health and vibrancy.
Also Read: Why Is My Peperomia Drooping? Reasons & Solutions.
Characteristics of Ideal Peperomia Soil:
1. Well-Draining:
Peperomias despise standing water around their roots, as excessive moisture can lead to root rot and other fungal diseases.
The soil’s ability to provide proper drainage is paramount in preventing these issues. A well-draining soil mix allows excess water to escape, ensuring that the roots remain consistently moist but never soggy.
This balance is achieved by incorporating materials like perlite or pumice into the soil mix, which create air pockets and pathways for water to flow through.
2. Aeration:
Proper soil aeration is essential for root health. Peperomia roots, like those of most plants, require oxygen to function optimally.
Compacted soil can impede the exchange of gases, resulting in stressed and suffocating roots. A well-aerated soil mix promotes root respiration, enabling your peperomia to absorb nutrients efficiently and grow vigorously.
3. Moisture Retention:
While peperomias prefer well-draining soil, they’re not succulents that thrive in extremely dry conditions.
These plants benefit from a soil mix that retains a certain level of moisture, providing a reservoir of hydration during dry spells.
Peat moss and orchid bark are components that help maintain a balance between moisture retention and drainage, ensuring your peperomia’s water needs are met without causing root rot.
4. Nutrient Content:
A healthy peperomia requires a steady supply of essential nutrients to support growth and foliage color.
While they aren’t heavy feeders, ensuring that your soil mix contains a modest amount of aged compost or a balanced, diluted fertilizer will provide the necessary nutrients for sustained vitality.
5. pH Balance:
The pH level of the soil significantly affects nutrient availability to plants. Peperomias generally thrive in slightly acidic to neutral soil conditions.
Maintaining the appropriate pH range ensures that essential minerals are readily accessible to the plant’s roots.
Regular monitoring and occasional testing of the soil’s pH can help you make necessary adjustments to maintain this balance.
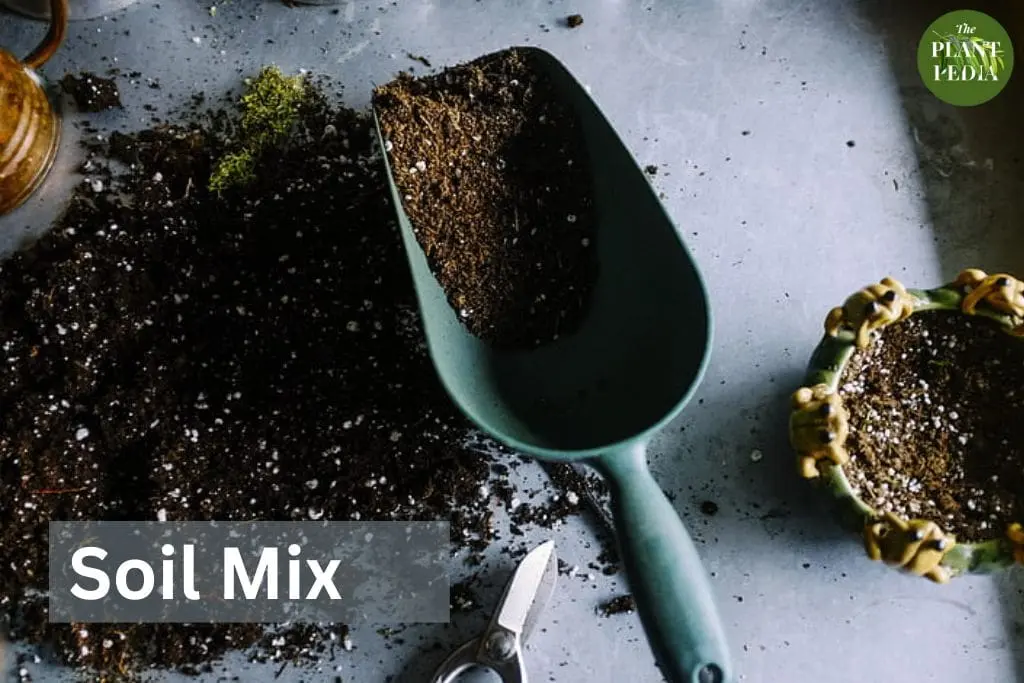
Creating the Perfect Soil Mix
Crafting the ideal soil mix for your peperomia plants requires a thoughtful approach that takes into account their unique needs and characteristics.
A well-structured soil mix not only provides a solid foundation for root development but also sets the stage for the overall health and vitality of your plants.
Let’s delve deeper into the process of creating the perfect peperomia soil mix.
Ingredients:
- Potting Soil: The base of your peperomia soil mix is potting soil. Opt for a high-quality commercial mix or create your own by combining equal parts of compost, peat moss, and perlite. Potting soil provides the necessary structure for root growth and acts as a reservoir for nutrients and moisture.
- Perlite or Pumice: To ensure proper drainage and aeration, incorporate perlite or pumice into the mix. These lightweight materials create air pockets in the soil, preventing compaction and allowing excess water to escape. Aim for a ratio of 20-30% perlite or pumice to ensure effective drainage.
- Peat Moss: Peat moss is an excellent moisture-retaining component that also contributes to the overall structure of the soil. It helps maintain a balanced level of moisture while preventing waterlogging. Aim for a ratio of 10-20% peat moss in your mix.
- Aged Compost: Adding a handful of aged compost introduces beneficial microorganisms and nutrients to the soil mix. These microorganisms play a crucial role in breaking down organic matter and making nutrients more accessible to the plant’s roots. The compost should make up around 5-10% of the mix.
- Orchid Bark: Orchid bark, finely graded, adds texture to the soil mix and aids in moisture retention. This component enhances drainage while maintaining a good balance of moisture. Include a small portion, about 5%, in your mix.
- Sand (optional): Depending on your specific needs, you may choose to include a small amount of coarse sand, roughly 5%. Sand further enhances drainage and prevents soil compaction. Consider adding sand if you’re using a denser potting mix.
Mixing Ratios:
Creating the perfect peperomia soil mix involves finding the right balance between drainage, aeration, and moisture retention.
While these ratios provide a general guideline, don’t hesitate to adjust them based on the specific requirements of your peperomia species and your local climate:
- 60-70% potting soil
- 20-30% perlite or pumice
- 10-20% peat moss
- 5-10% aged compost
- 5% orchid bark
- 5% sand (if desired)
Preparing the Mix:
As you embark on the journey of creating the perfect peperomia soil mix, follow these steps for a successful outcome:
- Select the Right Container: Choose a container that provides adequate drainage to prevent water from accumulating around the roots. Ensure the pot is slightly larger than the current root ball of your peperomia.
- Gather Your Ingredients: Before starting, gather all the necessary components to create a seamless mixing process.
- Mixing Process: In a large container or wheelbarrow, combine the potting soil, perlite or pumice, peat moss, aged compost, orchid bark, and sand (if applicable). Thoroughly mix the components, ensuring an even distribution throughout the mixture.
- Consider Adjustments: Keep in mind that the proportions can be adjusted based on the moisture preferences of your specific peperomia species and your local climate conditions. For peperomias that prefer drier conditions, you might consider increasing the ratio of perlite or pumice to enhance drainage further.
- Test the Mix: Once your soil mix is prepared, take a moment to evaluate its texture and moisture-retaining capacity. The mix should feel well-structured yet airy, providing the ideal balance between water retention and drainage.
By carefully crafting the perfect peperomia soil mix, you’re creating an environment that supports the growth, health, and beauty of your plants.
This foundational step lays the groundwork for successful peperomia care and ensures that your plants will flourish in their indoor habitat.
Remember, while the process might require a bit of experimentation and adjustment, the rewards of healthy and vibrant peperomias are well worth the effort.
Transplanting or Repotting Peperomias
Transplanting or repotting your peperomia is a pivotal step in their care journey, ensuring that they have the necessary space and fresh soil to continue thriving.
This process might seem daunting, but with the right approach, you can facilitate a smooth transition for your peperomia plants.
Choosing the Right Time:
Timing is crucial when it comes to transplanting or repotting peperomias. The best time for this activity is during the active growing season, which typically falls in the spring or early summer.
Avoid repotting during the dormant winter months, as your peperomia’s growth is minimal during this period.
Preparing the New Container:
Choosing an appropriate container is essential to provide your peperomia with a comfortable living space. Select a pot that’s slightly larger than the current one.
Ensure that the new pot has adequate drainage holes to prevent waterlogging and promote healthy root development.
Gently Remove the Plant:
Transplanting can be stressful for your peperomia, so it’s crucial to handle the plant with care. Begin by watering the plant a day or two before repotting.
This softens the soil and makes it easier to remove the plant from its current pot. Gently tip the pot upside down, supporting the plant’s base with your hand, and tap the sides to loosen the root ball.
Adding Fresh Soil Mix:
Place a layer of the new peperomia soil mix at the bottom of the new pot. The layer should be thick enough to elevate the peperomia to the desired height.
Carefully position the peperomia in the center of the pot and fill in the sides with the fresh soil mix. Gently press down the soil to eliminate air pockets and ensure good contact with the roots.
Watering and Care After Repotting:
After transplanting, it’s essential to water the plant thoroughly. This helps settle the soil around the roots and reduces transplant shock.
Be cautious not to overwater, as the plant might be more sensitive during this time. Monitor the moisture levels in the soil and adjust your watering routine as needed.
Adjusting to the New Environment:
Transplanting or repotting can be stressful for your peperomia, and it might take a little time for the plant to acclimate to its new environment.
During this period, keep an eye on the plant for any signs of stress, such as drooping leaves or slowed growth. Avoid fertilizing immediately after repotting, as the plant needs time to settle in.
Monitoring and Patience:
In the weeks following repotting, closely monitor your peperomia for any changes in its growth and appearance.
While it’s natural for the plant to experience a temporary setback due to the stress of transplanting, consistent care and patience will yield positive results.
Be mindful of its watering needs, light exposure, and overall health.
Maintaining Peperomia Soil
Caring for your peperomia plants doesn’t stop at the initial soil preparation and transplanting stages.
To ensure the continued health and vibrancy of your plants, it’s crucial to maintain the soil in which they grow.
Proper maintenance of peperomia soil contributes to root health, nutrient availability, and overall plant vitality.
Here are essential tips for effectively maintaining your peperomia soil.
1. Watering:
Watering is a critical aspect of maintaining peperomia soil. These plants prefer slightly moist conditions but are susceptible to root rot if overwatered.
Here’s how to manage watering effectively:
- Monitor Soil Moisture: Before watering, check the moisture level of the soil by inserting your finger about an inch into the soil. Water only when the top inch of the soil feels dry to the touch.
- Water Thoroughly: When you water, do so thoroughly until water starts draining from the bottom of the pot. This ensures that water reaches the entire root system and encourages healthy root growth.
- Avoid Waterlogged Soil: Empty the saucer under the pot after watering to prevent the plant from sitting in standing water. Peperomias dislike waterlogged soil, which can lead to root issues.
2. Watering Technique:
To maintain the right moisture balance, consider these watering techniques:
- Bottom Watering: Placing the pot in a saucer of water and allowing the plant to absorb water from the bottom can help prevent overwatering and keep the foliage dry.
- Misting: Some peperomia species appreciate increased humidity. You can mist the leaves occasionally to create a more humid microenvironment.
3. Fertilization:
Peperomias are not heavy feeders, but they do benefit from occasional feeding during the growing season (spring and summer).
Here’s how to approach fertilization:
- Choose the Right Fertilizer: Use a balanced, diluted liquid fertilizer with an N-P-K ratio around 10-10-10 or 20-20-20. Avoid over-fertilizing, as this can lead to nutrient imbalances and other issues.
- Frequency: Fertilize your peperomia every 4-6 weeks during the growing season. Dilute the fertilizer according to the manufacturer’s instructions to prevent overfeeding.
4. Pruning:
Regular pruning helps maintain the appearance and health of your peperomia. Follow these guidelines:
- Remove Yellowing Leaves: As leaves naturally age and yellow, promptly remove them to encourage the plant to direct energy toward new growth.
- Pinch Back: If your peperomia becomes leggy, consider pinching back the stems to encourage bushier growth.
5. Cleaning the Soil Surface:
Over time, debris, dust, and dead leaves can accumulate on the soil surface. Cleaning the soil surface is a simple but effective maintenance practice:
Gentle Removal:
As part of your routine peperomia care, it’s important to keep the soil surface clean and free from debris.
Accumulated debris not only affects the aesthetics of your plant but also impacts the health of the soil and the overall well-being of your peperomia.
Why Cleaning Matters:
Debris, fallen leaves, and dust that gather on the soil surface can create a barrier that hampers proper soil aeration and water absorption.
This barrier prevents air from reaching the roots and impedes the movement of water into the soil. In addition, the presence of decaying organic matter can attract pests and encourage the growth of harmful microorganisms.
By regularly cleaning the soil surface, you promote a healthier growing environment for your peperomia.
Common Soil-Related Issues and Solutions:
Even with diligent maintenance, peperomias can sometimes face soil-related challenges. Here are common issues and their solutions:
- Root Rot: If your peperomia’s leaves are turning yellow or drooping, root rot might be the culprit. Repot the plant into fresh, well-draining soil and adjust your watering routine to prevent excess moisture.
- Dry and Crispy Leaves: If the edges of the leaves are dry and crispy, it could indicate low humidity. Increase humidity around the plant by misting, using a humidity tray, or placing a small humidifier nearby.
- Slow Growth: If your peperomia’s growth seems slow, it might be lacking nutrients. Consider repotting the plant with fresh soil or providing a diluted, balanced fertilizer to boost growth.
- Yellowing Leaves: Yellowing leaves can result from both overwatering and underwatering. Pay attention to the moisture level in the soil and adjust your watering habits accordingly.
Related FAQs:
As you embark on your journey of peperomia care, questions about soil composition and maintenance are bound to arise.
To help you navigate these queries, here are some frequently asked questions related to peperomia soil, along with answers:
What type of soil is best for peperomia plants?
Peperomias thrive in a well-draining soil mix that balances moisture retention with aeration.
An ideal mix includes potting soil, perlite or pumice, peat moss, aged compost, orchid bark (optional), and sand (optional). This combination promotes healthy root growth and prevents issues like root rot.
Can I use regular potting soil for my peperomia?
While regular potting soil can be a base for your peperomia mix, it’s essential to enhance it with additives like perlite or pumice for drainage, peat moss for moisture retention, and aged compost for nutrient content.
A well-balanced peperomia mix ensures the best conditions for your plant’s growth.
How often should I repot my peperomia?
Peperomias generally benefit from repotting every 1-2 years, or when the current pot becomes too small and the plant outgrows it. Repotting allows for fresh soil and more space for root development.
My peperomia’s leaves are turning yellow. Is it a soil issue?
Yellowing leaves in peperomias can be caused by various factors, including overwatering, underwatering, inadequate light, or even nutrient imbalances.
While soil-related issues like poor drainage can contribute to yellowing leaves, it’s essential to consider all potential factors and adjust care accordingly.
How can I improve drainage in my peperomia soil?
To enhance drainage, incorporate materials like perlite, pumice, and coarse sand into your soil mix. These additives create air pockets, allowing excess water to escape and preventing waterlogging.
Can I reuse the soil from my old pot when repotting my peperomia?
While it might be tempting to reuse old soil, it’s generally recommended to refresh the soil mix when repotting.
Over time, soil can become compacted and depleted of nutrients. Mixing fresh soil ensures that your peperomia has the best start in its new pot.
How do I know if my peperomia needs repotting?
Signs that your peperomia needs repotting include roots visibly coming out of the bottom of the pot, slower growth, and frequent wilting despite regular watering.
Inspect the root ball—if it’s tightly packed and has limited room for growth, repotting is necessary.
Can I use a clay pot for my peperomia?
Clay pots can be a good choice for peperomias, as they allow for better airflow and moisture regulation. However, ensure that the pot has drainage holes to prevent waterlogging.
Can I use a self-watering pot for my peperomia?
While self-watering pots can be convenient, they might not be the best option for peperomias.
These plants prefer slightly drying out between watering, and self-watering pots can sometimes keep the soil consistently moist, which can lead to root rot.
Should I fertilize my peperomia regularly?
Peperomias benefit from occasional fertilization during the growing season (spring and summer). Use a balanced, diluted liquid fertilizer every 4-6 weeks.
Avoid over-fertilizing, as it can lead to nutrient imbalances and negatively impact the plant’s health.
Conclusion
Peperomia plants are delightful additions to any indoor space, and providing them with the right soil is a critical aspect of their care.
By understanding the unique characteristics of peperomias and tailoring your soil mix to their needs, you can ensure their health and vitality.
Remember that the perfect peperomia soil should be well-draining, aerated, and moisture-retentive while maintaining a balanced pH and nutrient content.
Through proper soil preparation, transplanting, and maintenance, you’ll be rewarded with thriving peperomia plants that continue to bring beauty and joy to your home for years to come.
Note: The specific soil mix you use for your peperomia will depend on the specific species of peperomia you are growing. Some peperomias prefer drier conditions than others, so you may need to adjust the mix accordingly.
