Repotting is a crucial aspect of plant care, especially when it comes to beloved species like the Monstera. This iconic plant is known for its lush, fenestrated leaves and its ability to thrive in a variety of environments.
However, to ensure its continued growth and vitality, understanding the intricacies of repotting is essential.
In this detailed guide, we will delve into the why, when, and how of repotting Monstera, providing you with expert insights and step-by-step instructions.
Table of Contents
Understanding the Monstera Plant

Anatomy of a Monstera
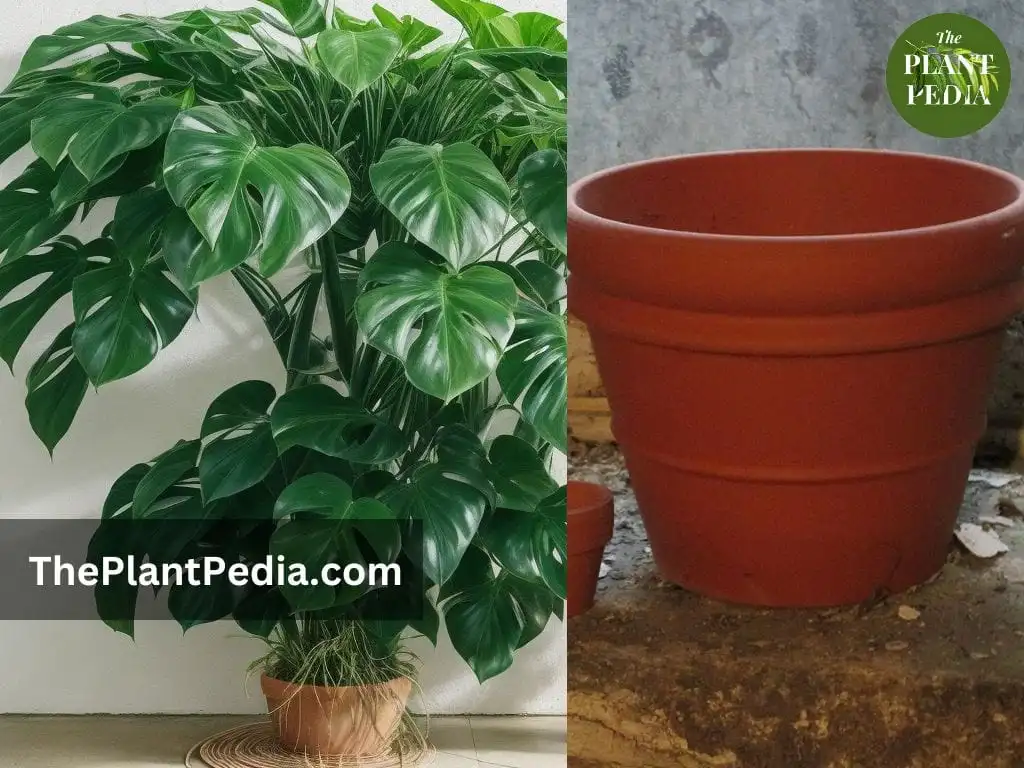
Before we dive into repotting, let’s familiarize ourselves with the Monstera. This tropical plant boasts broad, heart-shaped leaves that develop distinct fenestrations, earning it the nickname “Swiss Cheese Plant.”
Understanding its structure is key to successful repotting.
Read: Types of Monstera or Swiss Cheese Plants.
Growth Patterns
Monstera plants are vigorous climbers in their natural habitat. They exhibit a strong tendency to vine and will seek out structures to support their growth.
This behavior is important to consider when choosing a new pot and providing appropriate support.
Why Repot a Monstera?
Repotting a Monstera is a crucial aspect of its long-term health and vitality. Here are the key reasons why repotting is necessary:
Root Boundness
Over time, Monstera plants can become root-bound. This occurs when the roots outgrow the current pot, becoming tightly packed and circling around the bottom.
When left unaddressed, this can hinder the plant’s ability to absorb nutrients and water efficiently, leading to stunted growth and a decline in overall health.
Read: Monstera Aerial Roots: Purpose, Care, Propagation, & All.
Soil Depletion
The nutrients in the soil can become depleted over time, particularly in indoor settings where the plant’s access to natural nutrients is limited.
This can result in nutrient deficiencies, leading to lackluster foliage and reduced vigor.
Repotting provides an opportunity to replenish the soil with fresh, nutrient-rich substrate, giving your Monstera a renewed lease on life.
Aesthetic Considerations
As Monstera plants grow, they can become top-heavy or develop an unbalanced appearance.
Repotting into a larger, more stable pot allows the plant to spread its roots and foliage, creating a fuller, more balanced aesthetic.
This not only enhances its visual appeal but also contributes to a healthier, more robust plant.
Pest or Disease Infestation
If you suspect that your Monstera is struggling with pest or disease issues, repotting can be a strategic move.
By carefully removing the plant from its current pot, inspecting the roots, and providing fresh, disease-free soil, you can effectively remove potential threats and create a healthier environment for your plant to thrive.
By understanding these key reasons for repotting, you’ll be equipped to make informed decisions about when and how to undertake this essential aspect of Monstera care.
Remember, a well-timed repotting can significantly contribute to the long-term health and vibrancy of your beloved plant.

When to Repot Your Monstera
Knowing the right time to repot your Monstera is crucial for its overall health and well-being. Here are key considerations to help you determine the optimal time for repotting:
Signs It’s Time
Roots Emerging from Drainage Holes: One of the most evident signs that your Monstera is ready for a larger home is when roots start to emerge from the drainage holes at the bottom of the current pot. This indicates that the plant has outgrown its current container and requires more space.
Sluggish Growth: If you notice that your Monstera’s growth has noticeably slowed, despite providing adequate care and light, it may be an indication that it’s struggling for space and nutrients. Repotting can provide the fresh soil and room for root expansion that it needs to thrive.
Soil Becomes Hydrophobic: If you find that water consistently pools on the surface of the soil without being absorbed, it’s a sign that the roots may not be able to access it effectively. This could be due to compacted or depleted soil, indicating that repotting is necessary.
Seasonal Considerations
While Monstera plants can be repotted at any time of the year, it’s generally best to plan this task during the active growing season, which is typically in spring and early summer.
During this period, the plant is entering a phase of active growth, making it better equipped to recover from the transplant and establish itself in its new pot.
By keeping an eye out for these signs and considering the seasonal context, you can confidently determine when it’s the right time to repot your Monstera, ensuring it has the space and resources it needs to thrive.

Choosing the Right Pot and Soil
Pot Selection
When it comes to selecting the perfect pot for your Monstera, there are a few key considerations to keep in mind.
First and foremost, opt for a pot that is approximately 2 inches larger in diameter than the current one. This provides ample room for the roots to spread out without risking overpotting, which can lead to waterlogged soil.
Additionally, ensure that the pot has drainage holes at the bottom. Proper drainage is crucial for preventing water from accumulating at the bottom, which can lead to root rot.
If you find a decorative pot that doesn’t have drainage holes, consider using a plastic or clay nursery pot within the decorative one. This allows for adequate drainage while still maintaining an aesthetic appeal.
Soil Composition
The soil you choose plays a vital role in the health and well-being of your Monstera. A well-draining potting mix is essential to prevent water from pooling around the roots.
A recommended mixture includes a combination of peat moss, perlite, and orchid bark. This blend provides a balanced environment that allows for proper aeration and moisture retention.
Peat moss serves as the primary organic component, providing essential nutrients and moisture retention. Perlite, on the other hand, is a lightweight volcanic glass that aids in aeration and drainage.
Lastly, orchid bark adds structure to the mix and contributes to optimal drainage. This combination mimics the Monstera’s natural habitat, allowing it to thrive in its new pot.
By carefully selecting the right pot and soil, you’re setting the foundation for a successful repotting process that will promote healthy growth and vibrant foliage in your Monstera plant.
Preparation: Gathering Supplies
Before you embark on the repotting journey, it’s essential to have all the necessary supplies gathered and organized. This ensures a smooth and efficient process, minimizing stress for both you and your Monstera.
Tools You’ll Need
Pruning Shears:
Invest in a pair of sharp, clean pruning shears. These will be used for trimming any damaged or overgrown roots, as well as for pruning back any unhealthy foliage.
Read: Why, When & How to Prune Monstera Plant Leaves.
Trowel or Soil Scoop:
A sturdy trowel or soil scoop is invaluable for maneuvering and adding soil to the new pot. Look for one with a comfortable grip to ease the process.
Gloves (Optional):
While not mandatory, wearing gloves can protect your hands from any sharp edges on the pot or rough edges of roots.
Dust Mask:
Especially if you’re dealing with dusty old soil, a dust mask can help prevent inhalation of any particles that may be present.
Container for Excess Soil:
Having a container on hand to hold excess soil makes cleanup a breeze. It’s a small but crucial detail that can save you time and effort.
Creating a Workspace
Choose a spacious, well-lit area where you can comfortably work. Spread out a drop cloth or lay down old newspapers to catch any soil or debris that may fall during the repotting process.
This not only keeps your workspace tidy but also makes cleanup much easier once you’ve finished.
By having all your tools and materials at the ready, you’ll be well-prepared to tackle the repotting process with confidence and efficiency.
Remember, a well-organized workspace sets the stage for a successful transition for your Monstera.
The Step-by-Step Guide to Repotting Monstera
Repotting your Monstera is a delicate process that requires attention to detail and a gentle touch. Follow these steps to ensure a smooth transition for your beloved plant:
Step 1: Assessing the Plant’s Health
Begin by carefully examining your Monstera. Look for any signs of pests, disease, or damage. Trim away any unhealthy or yellowing leaves using clean pruning shears.
This step not only helps improve the overall appearance of the plant but also encourages new growth.
Step 2: Choosing the New Pot
Select a pot that is 2 inches larger in diameter than the current one. This provides ample space for the roots to grow and expand.
Ensure the new pot has drainage holes at the bottom to prevent water from pooling around the roots.
Step 3: Preparing the New Pot
Fill the new pot about one-third full with the prepared potting mix. Create a small mound in the center to support the plant once it’s placed.
Step 4: Removing the Monstera from Its Current Pot
Gently turn the old pot on its side, supporting the base of the plant with one hand. Tap the bottom or sides of the pot to loosen the root ball. Carefully slide the plant out, taking care not to damage the roots.
Step 5: Inspecting and Pruning Roots
Examine the roots closely. Trim any brown, rotting, or excessively long roots using clean pruning shears. Be cautious not to remove more than necessary, as healthy roots are crucial for the plant’s overall well-being.
Use your fingers to gently loosen any tightly wound roots, encouraging them to grow outward.
Step 6: Adding Fresh Soil
Place the Monstera in the center of the new pot, ensuring it’s positioned at the same depth as it was in the previous pot.
Begin filling in around the plant with the prepared potting mix. As you add soil, gently support the plant at its base to prevent any undue stress on the roots.
Step 7: Placing the Monstera in Its New Home
Position the potted Monstera in its designated location. If your variety of Monstera is a climber, provide appropriate support for it to latch onto.
Adjust the soil level as needed to ensure the plant is stable and secure.
Step 8: Watering and Settling
Water the plant thoroughly until water begins to drain from the bottom of the pot. Allow any excess water to drain away.
Give the pot a gentle shake to help the soil settle around the roots. This step ensures that the plant is well-settled in its new environment.
With these meticulous steps, you’ve successfully repotted your Monstera, setting the stage for continued healthy growth and lush foliage.
Remember to monitor the plant closely in the days and weeks following the repotting to ensure it adjusts smoothly to its new home.
Post-Repotting Care and Considerations
After successfully repotting your Monstera, it’s important to provide the right care to help it thrive in its new environment. Here are some crucial post-repotting considerations:
Placement and Light
Return the plant to its usual spot, but take a moment to consider its light requirements. Most Monstera varieties thrive in bright, indirect light. Avoid placing them in direct sunlight, as this can scorch their leaves.
If your Monstera is a climber, make sure it has access to a structure to support its growth.
Watering Schedule
Monitor the soil’s moisture levels closely in the first few weeks following repotting. While it’s important to keep the soil consistently moist, be cautious not to overwater.
Allow the top inch or two of soil to dry out before watering again. This helps prevent root rot and encourages healthy root development.
Monitoring for Stress
Keep a close eye on your Monstera for the first few weeks after repotting. It’s normal for a plant to experience a period of adjustment, which may be reflected in drooping or wilting leaves.
However, if these symptoms persist or worsen, it may be an indication of a more serious issue. Adjust lighting conditions or watering practices as needed to help your Monstera acclimate.
Additionally, consider providing slightly higher humidity levels during this period. This can be achieved by misting the leaves or placing a humidifier nearby. Adequate humidity helps reduce stress and promotes healthy growth.
Remember, patience and attentiveness are key during the post-repotting phase. Your Monstera may take some time to fully acclimate to its new home, but with the right care, it will flourish and continue to grace your space with its stunning presence.
Common Mistakes to Avoid
While repotting your Monstera is a beneficial process for its overall health and growth, there are some common mistakes that can hinder its progress. Here are key errors to steer clear of:
Using the Wrong Pot Size
Choosing the right-sized pot is crucial for the well-being of your Monstera. Going too large too soon can lead to overwatering and potential root rot.
On the other hand, using a pot that’s too small can restrict the plant’s growth and potentially lead to root-boundness.
Remember to select a pot that’s approximately 2 inches larger in diameter than the current one.
Overwatering
After repotting, it’s natural to want to ensure your Monstera is well-hydrated. However, overwatering can be detrimental.
Allow the soil to slightly dry out between waterings, and always ensure proper drainage in the pot. This helps prevent waterlogged roots and encourages healthy growth.
Neglecting Root Inspection
During the repotting process, it’s crucial to thoroughly inspect the roots. Neglecting this step can lead to ongoing issues, as damaged or rotting roots can impact the plant’s overall health.
Take the time to carefully examine the roots, trimming away any unhealthy portions as needed.
By avoiding these common mistakes, you’re setting the stage for a successful repotting experience that will benefit the long-term health and vitality of your Monstera.
Remember, patience and attentiveness are key in ensuring your plant thrives in its new environment.
Troubleshooting: Dealing with Transplant Shock
Transplant shock is a natural response that plants, including Monstera, may experience after being repotted. It’s important to recognize and address this condition promptly.
Here’s how to identify and remedy transplant shock:
Identifying Transplant Shock
Transplant shock can manifest in various ways, including:
- Wilting or Drooping Leaves: The plant may exhibit signs of stress by wilting or drooping. This is a temporary reaction to the disruption of its root system.
- Yellowing or Discoloration: Leaves may turn yellow or show signs of discoloration. This can be an indication that the plant is struggling to adjust to its new environment.
- Stunted Growth: Your Monstera may temporarily cease growing or exhibit slower growth as it redirects its energy towards root recovery.
Remedies and Recovery
To help your Monstera overcome transplant shock, consider the following remedies:
Provide Adequate Light:
Ensure your Monstera receives the appropriate amount of light based on its specific variety. Most Monstera varieties prefer bright, indirect light. Avoid placing it in direct sunlight, as this can exacerbate stress.
Adjust Watering:
During the recovery period, it’s crucial to be mindful of watering. Allow the soil to slightly dry out between waterings to prevent overwatering. This helps promote healthy root development.
Consider Humidity:
Increasing humidity levels around your Monstera can provide a supportive environment for recovery. You can achieve this by misting the leaves regularly or placing a humidifier nearby.
Avoid Disturbance:
Minimize any unnecessary handling or movement of the plant during the recovery period. This allows the Monstera to focus its energy on root system regeneration.
Be Patient:
Transplant shock is a temporary condition, and with time and proper care, your Monstera will likely recover and thrive in its new pot.
Remember, each plant is unique, and the duration of transplant shock can vary. By providing a supportive environment and monitoring your Monstera closely, you’ll increase its chances of a smooth recovery.
Related FAQs:
How often should I repot my Monstera?
- Monstera plants typically benefit from repotting every 1-2 years, or when they show signs of being root-bound or sluggish growth. Keep an eye on the plant’s development to determine when it’s time for a larger pot.
Can I repot my Monstera at any time of the year?
- While repotting can be done throughout the year, it’s generally recommended to undertake this task during the plant’s active growing season, which is typically in spring and early summer. This allows the plant to recover more swiftly.
What size pot should I choose for my Monstera?
- Opt for a pot that is approximately 2 inches larger in diameter than the current one. This provides enough space for root expansion without risking overpotting, which can lead to waterlogging.
How can I tell if my Monstera is root-bound?
- A clear sign of a root-bound Monstera is when roots start emerging from the drainage holes at the bottom of the pot. Additionally, if the plant’s growth has noticeably slowed despite proper care, it may be an indication of being root-bound.
What kind of soil is best for repotting my Monstera?
- A well-draining potting mix is crucial. A blend of peat moss, perlite, and orchid bark provides the ideal environment for Monstera roots. This combination ensures proper aeration and moisture retention.
Should I prune my Monstera before repotting?
- It’s a good practice to assess the plant’s health and trim away any damaged or yellowing leaves before repotting. However, extensive pruning of healthy foliage should be avoided, as it may cause additional stress to the plant.
How do I minimize transplant shock after repotting?
- To reduce transplant shock, ensure your Monstera is placed in an area with appropriate lighting, adjust your watering routine, and consider increasing humidity levels. Avoid disturbing the plant unnecessarily during this recovery period.
Can I use the old soil when repotting my Monstera?
- While you can reuse some of the old soil, it’s recommended to replace a significant portion with fresh, well-draining potting mix. This helps replenish nutrients and prevents soil compaction.
What if my Monstera has multiple stems? How do I repot it?
- If your Monstera has multiple stems or is a bushier variety, you may choose to divide it during repotting. Gently separate the stems and roots, ensuring each section has its own roots and leaves, and plant them in separate pots.
Conclusion
Repotting a Monstera is a rewarding endeavor that sets the stage for healthy growth and vibrant foliage.
By understanding the plant’s needs and following the steps outlined in this guide, you’ll be well-equipped to undertake this task with confidence.
Remember, every plant is unique, and it’s normal for a Monstera to take some time to adjust to its new environment.
With patience and attentive care, your repotted Monstera will thrive and continue to grace your space with its stunning presence.
Happy repotting, fellow plant enthusiasts! May your Monstera flourish and grow to new heights.
