Peperomia plants have gained popularity in recent years due to their diverse foliage and easy-care nature.
These charming houseplants are known for their unique leaf shapes and patterns, making them a favorite among plant enthusiasts.
If you’re looking to expand your collection of peperomias or share their beauty with others, propagating them from leaves is an excellent way to do so.
In this guide, we’ll walk you through the process of propagating peperomia from a leaf, step by step, while providing a thorough understanding of the science behind it.
Table of Contents
Understanding Peperomia Propagation
Before delving into the propagation process, it’s essential to understand a bit about the science behind it.
Peperomia plants can be propagated through various methods, including stem cuttings, division, and leaf cuttings.
Leaf propagation, in particular, is an intriguing process that involves creating a new plant from a single leaf.
While it might sound like magic, it’s actually a demonstration of a plant’s remarkable ability to regenerate and develop new cells.

You Can Also Read: Radiator Plant Propagation: When, How, All The Techniques & Tips.
What You’ll Need
To successfully propagate peperomia from a leaf, you’ll need a few essential tools and materials:
- Healthy Peperomia Plant: Choose a mature peperomia plant with healthy leaves. The leaf you select for propagation should be free from pests, diseases, and any signs of stress.
- Clean Scissors or Razor Blade: A sharp, clean cutting tool is crucial for making precise and clean cuts. This reduces the risk of damaging the parent plant and the leaf you’re propagating.
- Small Pots or Containers: You’ll need containers with drainage holes to plant the propagated leaves. These containers should be small and shallow to accommodate the young plantlets.
- Well-Draining Potting Mix: A mixture of peat moss, perlite, and orchid bark is ideal for peperomia propagation. It ensures proper drainage and aeration for the developing roots.
- Spray Bottle: A spray bottle filled with water will help maintain high humidity levels around the propagating leaf, encouraging successful root growth.
- Transparent Plastic Bag or Dome: Creating a mini greenhouse environment around the propagating leaf can enhance humidity and provide an optimal condition for rooting.
- Rooting Hormone (Optional): While not necessary, using a rooting hormone can potentially expedite root formation. Choose a hormone specifically designed for succulent or cactus propagation.

Read: Peperomia Propagation in Water: Step-by-Step Guidelines.

How to Propagate Peperomia from Leaf (Step-by-Step)
Step 1: Leaf Selection
Start by choosing a healthy leaf from the parent peperomia plant. Select a leaf that is mature and free from any damage or disease.
The leaf should be fully grown and have visible veins, as these veins will play a crucial role in the propagation process.
Step 2: Leaf Removal
Using clean scissors or a razor blade, carefully cut the selected leaf from the parent plant. Ensure that the cutting tool is sharp to create a clean cut that minimizes damage to the leaf.
Step 3: Leaf Preparation
After removing the leaf, allow it to sit in a dry and shaded location for a day or two. Allowing the cut end of the leaf to callous over helps prevent rot when it’s planted.
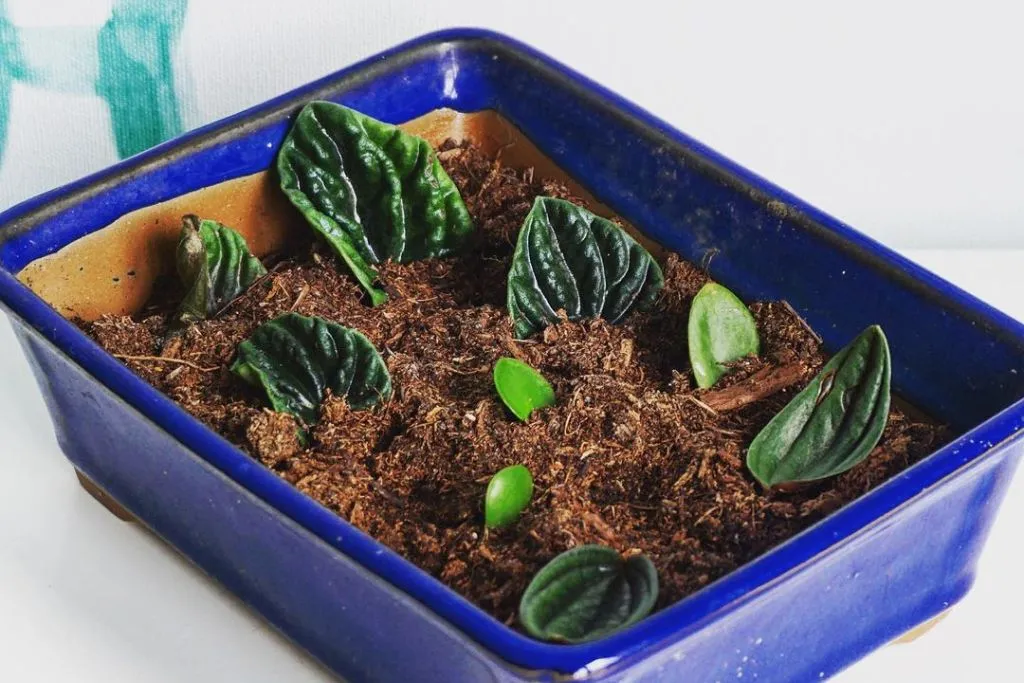
Step 4: Planting the Leaf
Fill a small container with well-draining potting mix. Make a small hole in the soil using a pencil or your finger.
Insert the cut end of the leaf into the hole, burying it about an inch into the soil. Gently press the soil around the leaf to secure it in place.
Step 5: Creating a Mini Greenhouse
To create a humid environment for the leaf cutting, you can cover the container with a transparent plastic bag or place a dome over it. This helps maintain moisture and increases the chances of successful rooting.
Step 6: Providing Light and Humidity
Place the container in a location with bright, indirect light. Avoid placing it in direct sunlight, as this can lead to excessive heat and cause the leaf to dry out.
Mist the leaf and the inside of the plastic bag or dome regularly to maintain high humidity levels.
Step 7: Root Formation
Over the next few weeks, the leaf will begin to develop roots. You might also notice small plantlets forming at the base of the leaf. These plantlets will eventually grow into new peperomia plants.
Step 8: Transplanting
Once the new plantlets have developed a few roots and are a few inches tall, they can be carefully transplanted into their individual pots.
Use the same well-draining potting mix as before and ensure that the plantlets are planted at the same depth as they were in the original container.
Step 9: Caring for Young Plants
As the new plants grow, continue to provide them with bright, indirect light and keep the soil consistently moist but not waterlogged.
Over time, you can acclimate them to a regular peperomia care routine, including watering and fertilizing.
Read: How to Propagate Peperomia from Stem (Step-by-Step).
Best Time for Peperomia Leaf Propagation
The timing of peperomia leaf propagation can play a significant role in the success of the process.
While peperomias are generally adaptable and can be propagated throughout the year, there are certain seasons and conditions that are more favorable for successful leaf propagation.
The best time to propagate peperomia from a leaf is during the plant’s active growing period, which is typically in the spring and early summer. Here’s why:
- Spring and Early Summer Growth: Peperomia plants naturally experience a growth spurt during the spring and early summer months. This is when they’re most actively growing and producing new leaves and shoots. Propagating during this period takes advantage of the plant’s natural growth cycle, increasing the chances of successful root development and new plantlet formation.
- Increased Daylight Hours: Spring and early summer are characterized by longer daylight hours. Adequate light is crucial for photosynthesis and overall plant health, including root and shoot development in propagated leaves. The increased sunlight during these months provides the energy needed for successful propagation.
- Favorable Temperature Range: Warmer temperatures during the spring and early summer create an optimal environment for root growth. Peperomias prefer temperatures between 65°F to 75°F (18°C to 24°C), which align well with the conditions of these seasons. Root development is more efficient when the soil is consistently warm.
- Seasonal Growth Hormones: Plants naturally produce growth hormones that encourage new growth during the active growing season. These hormones can have a positive impact on root formation and the overall success of leaf propagation.
- Recovery Period: Propagating peperomia during the growing season allows the parent plant to recover more quickly from the loss of a leaf. The plant has the resources and energy to produce new leaves and continue its growth without being hindered.
- Outdoor Options: If you have outdoor growing space, spring and early summer are ideal for peperomia leaf propagation. The higher humidity levels and gentle sunlight outdoors can create a conducive environment for successful root and shoot development.
It’s important to note that while spring and early summer are the most favorable times for peperomia leaf propagation, you can still attempt propagation during other times of the year with proper care and attention.
During the colder months or periods of slower growth, you might need to provide additional warmth and humidity to ensure the success of the propagated leaf.
The Science Behind Peperomia Leaf Propagation
Peperomia leaf propagation is a fascinating process that showcases the plant’s ability to regenerate and produce new plants.
When you cut a healthy leaf from the parent plant, it contains specialized cells known as meristematic cells.
These cells are responsible for growth and differentiation, and they play a crucial role in the formation of new roots and shoots.
When the leaf is planted in a suitable environment with adequate moisture and humidity, these meristematic cells become active.
They start dividing and differentiating, forming the initial roots and young plantlets. The process is similar to tissue culture, a laboratory technique used to grow new plants from a small piece of tissue, like a leaf or stem, in a controlled environment.
The calloused end of the leaf helps prevent water loss and fungal infections while the plant is focusing its energy on root and shoot development.
The high humidity inside the plastic bag or dome creates a microclimate that encourages cell growth and root formation.
Tips for Successful Peperomia Leaf Propagation
While propagating peperomia from a leaf is relatively straightforward, there are some additional tips that can increase your chances of success:
- Choose Healthy Leaves: Select leaves that are free from damage, pests, or diseases. Healthy leaves have a better chance of successful propagation.
- Use Well-Draining Mix: Peperomias prefer well-draining soil. A mix of peat moss, perlite, and orchid bark provides the ideal environment for root development.
- Maintain High Humidity: Humidity is crucial for successful root formation. Using a plastic bag or dome helps maintain the necessary moisture levels.
- Avoid Overwatering: While you want to keep the soil consistently moist, be careful not to overwater, as this can lead to rot.
- Provide Indirect Light: Bright, indirect light is best for propagating peperomias. Direct sunlight can scorch the leaves and hinder root growth.
- Be Patient: Root and shoot development takes time. Don’t be discouraged if you don’t see immediate results; be patient and allow the process to unfold naturally.
- Experiment with Rooting Hormones: While not necessary, using a rooting hormone can potentially speed up root development. Follow the manufacturer’s instructions for best results.
Related FAQs:
Can all types of peperomia be propagated from leaves?
While most peperomia species can be propagated from leaves, some might have better success rates than others. Varieties with thicker leaves and visible veins tend to be more suitable for leaf propagation.
Do I need to use a rooting hormone for peperomia leaf propagation?
Using a rooting hormone is optional but can potentially speed up root formation. Choose a rooting hormone designed for succulents or cacti, as peperomias have similar water storage abilities.
How long does it take for a leaf to form roots and new plantlets?
It usually takes a few weeks to a couple of months for a leaf to develop roots and small plantlets. The timing can vary based on factors like temperature, humidity, and the health of the parent plant.
Can I propagate a peperomia leaf in water instead of soil?
While water propagation is possible, peperomias generally prefer well-draining soil. Water propagation might lead to root rot if not done carefully. It’s recommended to use a soil-based method for better success.
Should I cut the leaf into sections for propagation?
No, it’s not necessary to cut the leaf into sections. Propagating the entire leaf, including its base where the stem attaches, is sufficient for successful propagation.
How often should I mist the propagating leaf and the plastic cover?
Mist the propagating leaf and the inside of the plastic cover once or twice a day to maintain high humidity. Be careful not to overdo it, as excessive moisture can lead to fungal issues.
Can I propagate peperomia leaves during the winter months?
While it’s possible to propagate peperomia leaves during the winter, it might be more challenging due to lower light levels and reduced growth rates. Providing additional warmth and indoor lighting can help improve success rates.
When should I transplant the new plantlets into individual pots?
Transplant the new plantlets once they have developed a few roots and are a few inches tall. This is typically a few weeks to a couple of months after propagation.
Can I use a leaf that has fallen off naturally for propagation?
It’s best to use a healthy leaf that you carefully cut from the parent plant. Leaves that have fallen off naturally might not have the same level of viability for successful propagation.
What can I do to prevent mold or fungal issues during propagation?
To prevent mold or fungal issues, ensure good air circulation and avoid overcrowding of the propagating leaves. Use well-draining soil and avoid excessive moisture. If mold appears, gently remove the affected area and adjust the care routine.
Is peperomia leaf propagation suitable for beginners?
Yes, peperomia leaf propagation can be a great option for beginners, as it’s relatively straightforward and doesn’t require specialized equipment. With proper care and attention to detail, beginners can achieve successful results.
Can I propagate variegated peperomias from leaves?
Yes, variegated peperomias can also be propagated from leaves. However, keep in mind that variegated plants might have slightly slower growth rates compared to non-variegated ones.
Can I propagate multiple peperomia leaves in the same container?
It’s best to propagate one peperomia leaf per container to prevent overcrowding and competition for resources. This ensures each leaf gets the necessary space and nutrients for successful propagation.
Can I propagate peperomia leaves using a different medium, like sphagnum moss?
While soil-based mediums are commonly used for peperomia leaf propagation, you can experiment with other mediums like sphagnum moss. Just ensure that the medium provides good aeration and drainage to prevent rot.
What should I do if the propagated leaf starts to wilt or decay?
If the propagated leaf starts to wilt or decay, it might be a sign of overwatering or improper care. Adjust your watering routine and ensure the environment is well-ventilated. In some cases, you might need to remove the decaying leaf and try propagating a different one.
Conclusion
Peperomia leaf propagation is a rewarding and educational process that allows you to witness the incredible regenerative capabilities of plants.
By selecting a healthy leaf, creating the right environment, and providing the necessary care, you can successfully propagate peperomias and expand your plant collection. Remember, each step of the process—from leaf selection to acclimating the new plants—contributes to the overall success of propagation.
With patience and attention to detail, you’ll soon have a new generation of beautiful peperomias to enjoy and share with fellow plant enthusiasts.
Happy propagating!
